
This year might have been the Princess Halloween to end all Princess Halloweens (as in, I might not be doing this again). I made not one but two princess dresses from scratch, one with a tutorial, the other with no pattern. It started with Ariadne asking to wear the Cinderella dress. Well remembered, the Cinderella dress was possibly the most ambitions sewing project I've done to date. Now, Charlotte was a preschooler wearing approximately a size 4 when I made her that dress. Aria is a 1st grader who wears size 7-8. I knew there was no way it would fit (plus, it is still packed in a box somewhere). So I offered to make her her own princess dress. She chose Princess Sofia the First. While I knew it would take a lot of time, I figured I was safe, since Charlotte had already declared that she wanted to be a ghost, wearing a white morph suit and all white clothes--same concept as Nova's shadow costume from last year.
 But then, well, the princess pull was strong. We've been studying the middle ages. Charlotte likes sewing. She asked if she could sew her own Medieval princess dress. I said yes. But there were no patterns in her size. So we thought we could adapt an adult pattern (Charlotte is about a kids size 14). Actually, it was impossible to adapt that very curvy adult pattern with all the points that had to land just so on the torso.
So suddenly, we were making her costume entirely from scratch, drafting the pattern and everything. To the right are some sketches Charlotte made of the kind of dress she might like. While Charlotte is an accomplished sewer for 9, she decided this was too complicated for her and, viola, I was sewing two princess dresses from scratch. Only two weeks until Halloween.


I used the Cinderella tutorial from Homemade Toast for the base of Aria's costume. The beauty of this pattern is the stretchy fabric used in the middle of the bodice. (You make it yourself with elastic thread, so it can be in any color). It allows for a lot of movement and growth with no buttons or zippers. Here is the bodice. We had a free interpretation with the trim, based on what the fabric store had available. I think we did well.

For the skirt we used circle skirts. I made one of lining and trimmed it with ribbon about 8'' up from the hem.


The overskirt was also a circles skirt I folded it in sixths (like a paper snowflake) and tried to get a petal shape. (This was the initial cut, if I recall correctly, it was too pointy so I refolded and rounded out the lower edge and maybe the tip).


The 'pearl' edge is actually pom pom trim. I sewed it on to the right side of the fabric edge with the pom moms facing up, then flipped it back so the pom moms hung down and top stitched all around.
I made the crinoline (poofy underskirt) as a separate garment this time. It is so much better this way! It is in fact, they way they used to do it when people dressed like this for real. It was easier to sew, will be easier to clean, and as a bonus, Aria can wear it with other dress up outfits.

Aria wanted to get in on the sewing action too, so she made a dress for her doll Saffi (short for Sapphire) with scraps. Our cat Salvos also got involved our sewing projects. All that tissue paper was irresistible!


Charlotte's bodice was constructed using the T-shirt method of pattern drafting. We added a point to the waistline at back and front, and at the neckline as well for more of a princess effect. I cut faux princess seams on the front. At 9, she has no curves, which, is why I say 'faux.' No real shaping is involved, but I did curve them to mimic adult princess seaming. In the back these lines were used to creat the middle piece for the corset section. I added an inch and a half or so so that the dress could fit her for a couple sizes. The sides I taped together at the underarm, making a total of four pieces for the bodice.


 I put the loops for the corset back on the back edges of the side pieces. To do it over again, I would have placed them a little lower. When I laced up the back I could use 2-3 three more loops at the bottom and the top ones aren't really doing anything. The were reinforced with some woven tape, as well as the trim. Though we got through Halloween just fine, a couple loops did pull out during dress-up play shortly thereafter, so they should have been reinforced better--or perhaps it would be best for the loops to be made of a continuous cord instead of individual loops.
Though I am going through the construction separately, I did work on both dresses at once. Below you can see both bodices at roughly the same stage. Charlotte's definitely took more thinking and research, since there was no tutorial or real pattern. I called both my mom, a Family Consumer Science (HomeEc) teacher, and my sister, a costume designer, for advice before I was done.

Sleeves were the only thing I used the pattern for, shortening them considerably. Perhaps I shortened them too much, or maybe the bodice never would have matched up, since I made my own bodice pattern. At any rate, we needed a solution.


Enter armpit gussets! I turned the the fabric so the stretch went up and down instead of side to side for greater range of motion. I used a diamond shape, but in retrospect, a football shape would have worked a little better. I sewed them on the the bottom edce of the sleeve, matching up the point and the seam line. Then I pinned the sleeve with the gusset to the bodice and sewed them on as normal. They worked out great! Charlotte can lift her arms all the way above her head without the dress riding up.

After seeing how well Aria's circle skirt flared, Charlotte wanted one too. We had to fold the fabric the long way and cut out two half circles and sew them together to get the length we wanted.To make the opening for the bodice, I marked the middle of the circle, folded it in half and laid the bodice on top, marking the point in the middle and the sides.

I cut out a triangle shape (actually a diamond shape, since it was along the seem and therefore double) for the waist opening. I couldn't see much of the V at the waist when we were done, but the rope belt echoes that detail well. It ended up having a 38'' radius, and coming down to Charlotte's ankles. It also flares.


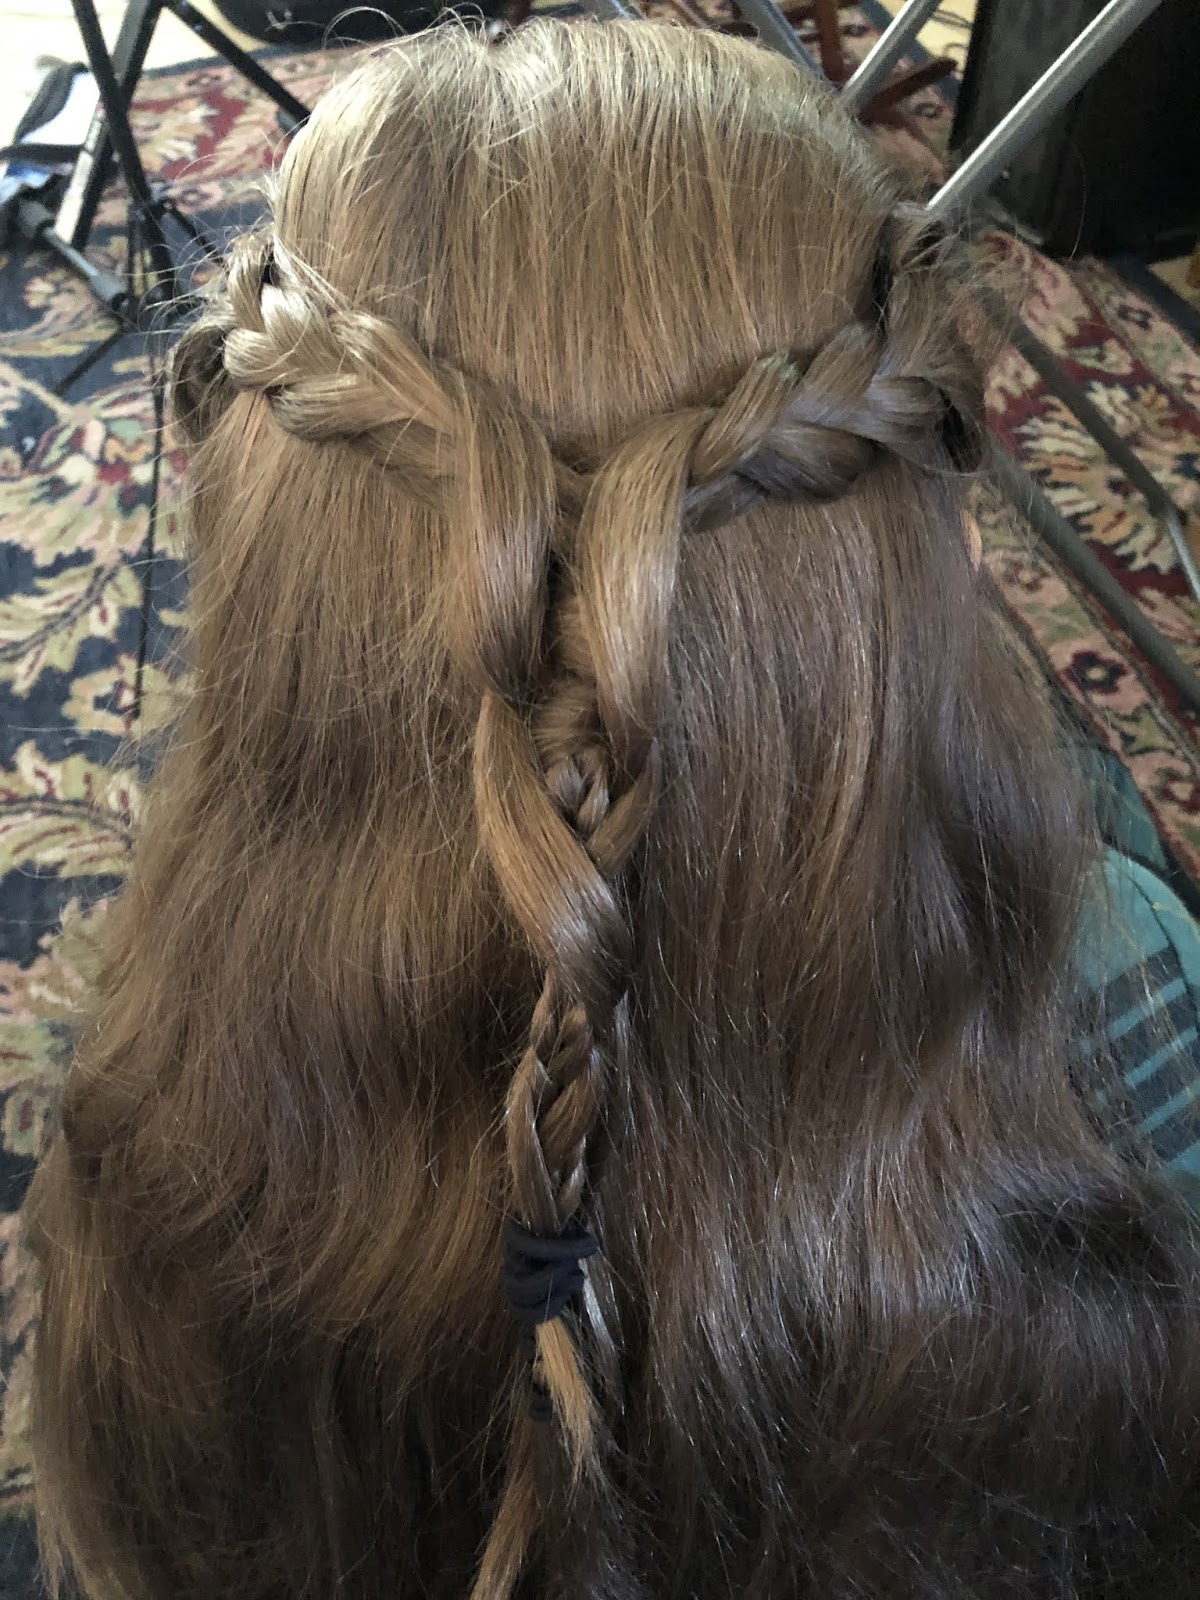 Here we have Princess Charlotte, complete with crown and rope belt. I ordered both the Princess Sophia jewelry and the Medieval Princess jewelry online. Charlotte's is from the bridal section, but not expensive. We happened to find some shoes that worked at GoodWill (which you can see in the final picture in the post). I am always on the fence about shoes for halloween costumes. They typically push the cost of a costume over the edge to a point I am not happy with. On the other hand, a medieval princess wearing tennis shoes is a little out of place. Usually we have dress shoes from Suzuki recitals on hand for this sort of thing, but since we haven't had a recital since we moved, that was out. GoodWill came through this year (and to be honest, as fall went on, both girls wore these little flats until they were worn out) We also played around with hair a little bit, though you can't see it in any of the finished costume pictures.
And voila, two princess dresses in under two weeks!

No comments:
Post a Comment